
how to wrap handlebar tape on a bike comes down to two things: consistent tension and smart coverage around the clamp area, so your hands feel supported and the tape stays put.
If your tape keeps slipping, bunching at the bends, or leaving a gap behind the brake hoods, you’re not alone, those spots are where most home installs go sideways. The good news is you don’t need a shop stand or fancy tools, you need a repeatable method and a couple of small decisions made up front.
This guide walks you through prep, wrap direction, hood coverage, finishing techniques, and quick fixes. I’ll also flag the common “looks fine today, fails next week” mistakes, because that’s usually what makes people hate re-taping.
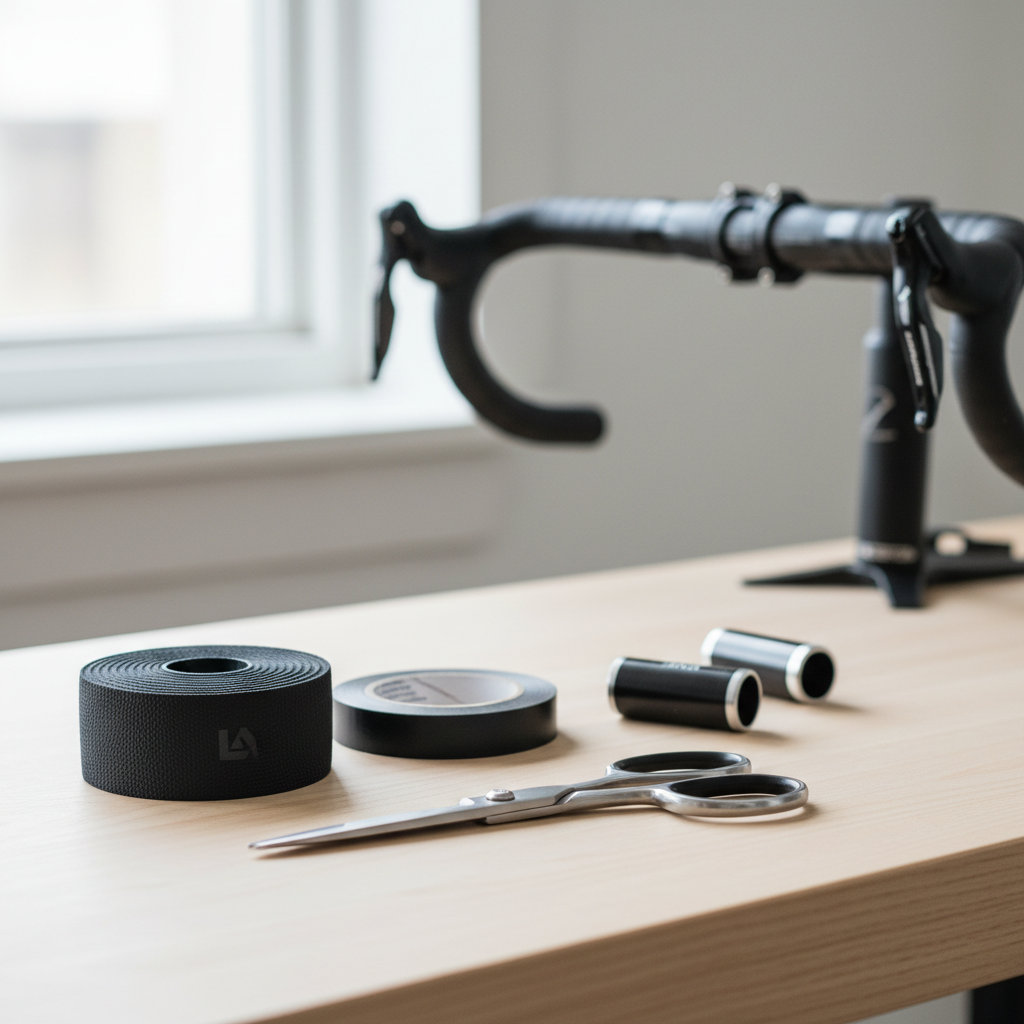
What you’ll need (and what actually matters)
You can wrap bars with a minimal kit, but a few choices here affect comfort and durability more than people expect.
- Handlebar tape: most modern tapes include finishing strips and bar-end plugs, verify before starting.
- Sharp scissors or a fresh blade: clean cuts matter at the hood and finish.
- Electrical tape (optional but common): helps lock the finishing end before your finishing strip goes on.
- Isopropyl alcohol + rag: for cleaning the bar so adhesive-backed tape sticks evenly.
- Small screwdriver/hex key: to remove bar-end plugs and, if needed, loosen hood position slightly.
Key point: tape quality changes the “forgiveness” of the job. Thicker, tackier tape hides small overlap inconsistencies, thin classic tape looks great but shows every mistake.
Before you start: setup and quick checks
Most messy wraps aren’t caused by wrapping skill, they start with skipping prep. Give yourself five minutes here and you save an hour later.
- Remove old tape and residue: peel slowly, then wipe the bar clean so new adhesive has full contact.
- Inspect cables: confirm housing sits where you want it under the tape, no sharp bends, no rattling.
- Check hood position: if the hoods are rotated unevenly, the tape will look uneven even if you wrap perfectly.
- Dry-fit your overlap: wrap a few turns without sticking, decide whether you want a narrow overlap (lighter, less cushion) or wider overlap (more padding).
According to Shimano (service and installation guidance for road levers), correct lever placement and secure clamp setup matter for control and safety, so if anything feels loose at the hood clamp, fix that before taping.
Wrap direction: the simple rule most riders follow
The direction isn’t about superstition, it’s about how your hands naturally roll the tape edge under pressure.
- Common approach: wrap each side so that when you ride in the drops and your hands rotate forward, your grip tends to tighten the tape rather than lift the edge.
- Practical shorthand: start at the bar end and wrap toward the stem on both sides, keeping the overlap consistent.
Reality check: different riders apply force differently, and some bar shapes make either direction work. If your current tape tends to lift at the front edge near the drops, reversing direction on your next install often helps.
Step-by-step: how to wrap from bar end to the hoods
This is the “clean baseline” method. Go slow for the first 6–8 turns, that’s where alignment gets set.
1) Anchor the first wrap and install the bar-end plug
Leave about 1–2 inches of tape extending past the bar end, wrap inward with firm tension, then fold the overhang into the bar opening and push the plug in to lock it. This gives you a tidy edge and prevents the tape from pulling out later.
2) Keep tension consistent and overlap steady
Pull with the same force each wrap, and keep your overlap visually consistent. Many people aim for about 1/3 overlap as a starting point, then adjust for more cushion if they ride rough pavement.
- If you see wrinkles, you’re either pulling unevenly or twisting the tape angle too abruptly.
- If you see gaps, increase overlap slightly or correct your tape angle before the next turn.
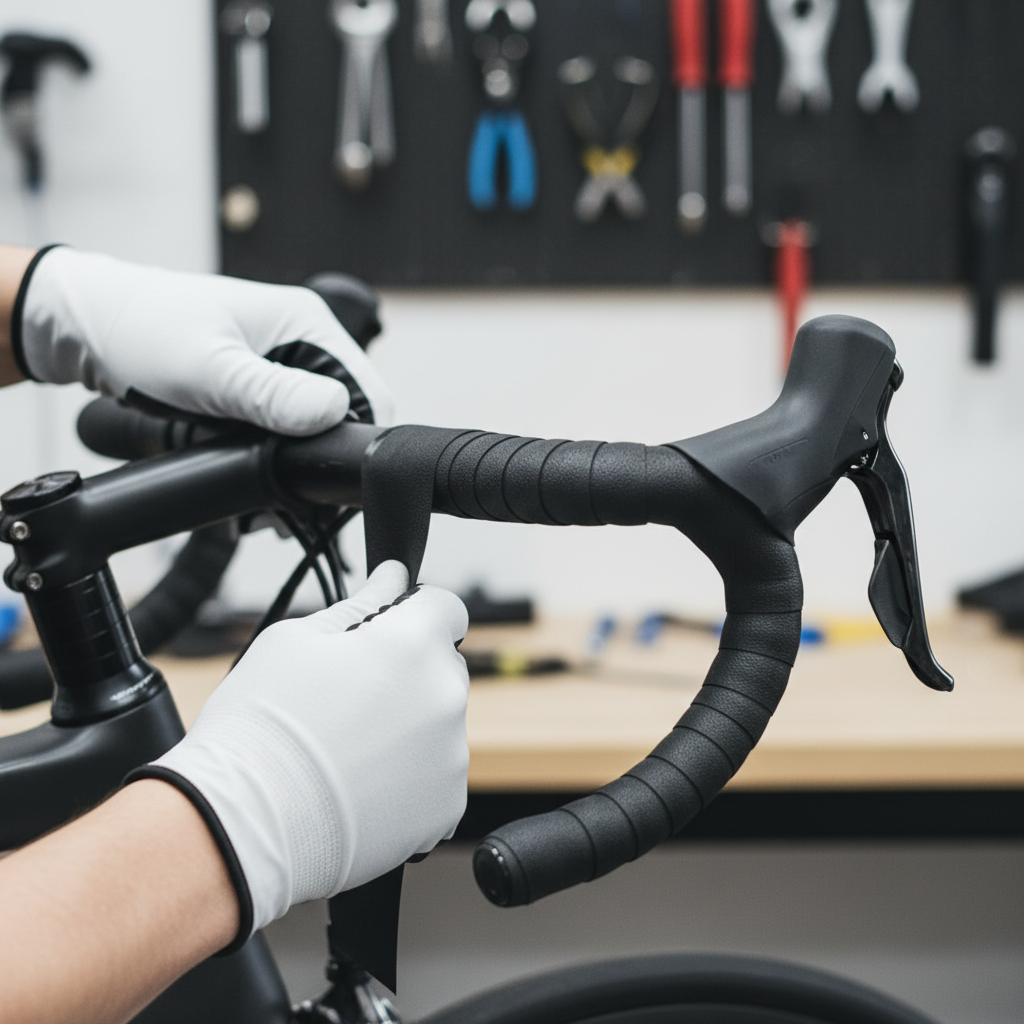
3) Approach the hood clamp area without leaving a gap
This is where most “how to wrap handlebar tape on a bike” tutorials either overcomplicate or gloss over. Your goal is simple: cover the clamp area so skin never touches bare metal and the tape doesn’t unravel when you flip the hood cover back down.
Two common options work:
- Figure-eight method: wrap up behind the hood, cross over, loop around, and return, it covers irregular shapes well but takes practice.
- Clamp-cover patch method: use the small supplied adhesive strips (or cut a short piece) behind/around the clamp, then continue with normal spirals, quicker and often cleaner.
Don’t chase perfection here. What you want is no exposed clamp edge and no bulky lump where your palm rests.
From the hoods to the stem: finishing cleanly
Once you’re above the hoods, the tape path gets easier, but finishing is where wraps fail weeks later.
1) Decide your finish point before cutting
Most riders finish a little short of the stem clamp, leaving space for accessories or bar bags, but the exact endpoint is personal preference. Keep the last wraps straight, then hold the tape where you want it to end and cut at an angle so the edge lies flush.
2) Lock the end before you apply finishing tape
Use a short piece of electrical tape or the included finishing strip to keep tension from relaxing. Press the edge down firmly, especially with adhesive-backed tape that needs full contact.
3) Reposition hood covers and check for lift
Flip the rubber hood covers back into place and look at the edges. If you see a corner lifting, fix it now, once it picks up sweat and dust, it becomes harder to re-stick.
Quick self-check: is your wrap “good enough” or heading for failure?
You don’t need it to look like a catalog photo, but a few signs predict whether you’ll be redoing it soon.
- No gaps where your hands rest in the drops or on the tops.
- No exposed clamp metal around the brake hood area.
- Even overlap: small variation is fine, sudden changes usually feel lumpy.
- Ends secured: bar-end plugs sit tight, finishing tape holds the cut edge flat.
- Symmetry check: left and right don’t need to match wrap count perfectly, but the finish height should look intentional.
Common mistakes (and the fixes that actually work)
Most problems have a simple cause, and usually it’s not “you’re bad at this.”
- Wrinkles near tight bends: reduce tape angle change, pull tension more evenly, and do smaller corrections earlier.
- Tape lifts after a few rides: bar wasn’t cleaned, adhesive didn’t bond, or finish end wasn’t locked. Clean and re-tape the last 2–3 wraps if needed.
- Bulky hood area: too many figure-eight turns or a patch stacked under a spiral. Remove and redo that section with fewer layers.
- Bar-end plug pops out: not enough tape folded into the end, or plug size mismatch. Re-seat with more folded tape, consider different plugs.
According to Park Tool (general repair guidance and taping demonstrations), steady tension and consistent overlap are the fundamentals, and trying to “fix” a bad section by pulling harder mid-wrap often makes the next section worse.
Choosing tape and overlap: a practical comparison table
If you’re unsure how much overlap to use, start with comfort goals, then match the tape style.
| Tape type | Typical feel | Overlap suggestion | Good for |
|---|---|---|---|
| Cork/synthetic cork | Balanced grip, moderate cushion | Medium (about 1/3) | All-around road riding |
| PU (tacky) tape | Very grippy, easier to keep aligned | Narrow to medium | Hot weather, sweaty hands |
| Gel-backed or extra thick | Soft, vibration damping | Narrow (thickness adds up fast) | Rough pavement, long rides |
| Cloth/cotton (shellac style) | Classic look, firm feel | Medium to wide (to avoid gaps) | Vintage builds, dry conditions |
When to stop and get help
Wrapping is DIY-friendly, but a few situations justify a shop visit or an experienced friend’s eyes.
- Brake/shift levers feel loose or rotate, don’t tape over a mechanical problem.
- Cable housing is damaged or kinked, you may need replacement before re-wrapping.
- Numbness or hand pain persists after re-taping, fit issues (bar width, reach, hood rotation, saddle position) may be involved, consider a professional bike fit.
Comfort changes can affect wrist position and pressure points, so if you have ongoing pain or tingling, it’s reasonable to consult a qualified fitter or healthcare professional.
Conclusion: a clean wrap is mostly consistency
If you remember one thing, make it this: steady tension plus reliable hood coverage beats fancy tricks. Start at the bar end, keep overlap predictable, take your time at the hoods, and finish with an angled cut that sits flat.
For your next ride, do a quick post-check after 10–15 minutes, press down any edges, and confirm the bar-end plugs stayed tight. That small habit is often what separates a wrap that lasts a season from one that unravels in a week.
FAQ
How tight should handlebar tape be when wrapping?
Tight enough that you can’t rotate it by hand after a few wraps, but not so tight that it stretches thin or tears at corners. If the tape has adhesive, firm pressure plus a clean bar usually matters more than brute force.
Do I start wrapping handlebar tape from the stem or the bar ends?
Most riders start at the bar ends and wrap toward the stem because it makes it easier to lock the end with the bar plug, and the overlap tends to resist lifting under typical hand movement.
How do I avoid gaps behind the brake hoods?
Use either a small patch piece under the hood clamp area or a careful figure-eight pass, then check coverage before you commit to the next spiral. If you see metal, it usually gets worse once you ride and the hood rubber shifts.
What overlap should I use for more comfort?
Wider overlap adds cushion fast, but it also increases bulk. Many people get better comfort by using slightly wider overlap in the drops only, while keeping the tops tighter for a cleaner feel.
Can I reuse old bar tape?
Sometimes cloth tape can be reused if it wasn’t glued heavily and still lays flat, but most modern adhesive-backed tapes don’t re-stick well. If it feels dry, stretched, or creased, replacing saves time.
Why does my tape unravel near the stem?
Usually the finishing end wasn’t cut cleanly, wasn’t secured before the finishing strip, or the bar wasn’t cleaned so the adhesive never bonded. Rewrapping the last few turns with a better angled cut often fixes it.
How often should I replace handlebar tape?
It depends on sweat, mileage, and weather exposure. If it feels slick, smells persistently, compresses flat, or starts lifting at edges, that’s a practical cue to refresh it.
If you’re doing how to wrap handlebar tape on a bike because your hands go numb or you’re chasing more comfort on longer rides, it can help to treat tape as part of the cockpit setup, not just a cosmetic job. If you’d rather skip trial-and-error, a local bike shop can match tape thickness and hood positioning to your riding style so you get a cleaner wrap and a better feel at the same time.